Climbing Mt. Kilimanjaro
The Roof of Africa

Preparations
After contacting approx. 6 tour organizers we went with Bryson Adventures, a small agency located in Moshi. We booked an exclusive tour just for the four of us:
- We decided to go the Machame Route early on because of it's reputation of high success rate and great scenery.
- 3-person tents, 2 people per tent, camping mats included.
- Separate tent to serve as a common space including table and chairs
- A crew consisting of 14 porters, a cook, and two English speaking guides.
- Oxygen cylinder for emergencies. We luckily didn't need it, but used it to help somebody from a less well-prepared group.
- Toilet tent including chemical toilet. Yes, carrying a chemical toilet up the highest mountain of Africa sounds ridiculous, but once we saw the queues of people and the condition the public facilities were in we knew that was the right decision.

")
We skipped any extras that didn't have to do with the climb (i.e. airport transfers and hotels before and after), since these things could be easily organized by ourselves.
The nights before and after the tour were spent at the Honey Badger Lodge a few km outside of Moshi. Nothing too fancy, but it was clean, had good food and a nice pool.
We also chose to pay the entry fees of the Kilimanjaro national park ourselves by credit card, just to limit the amount of money we had to transfer to Tanzania upfront.
Prices of agencies organizing the climb vary greatly and comparing will pay off. In the end it's, except a few gimmicks here and there, the same experience regardless of the organizer. After all, everybody sleeps in tents and all walk one of the three available routes. The biggest factors that determine how much you will enjoy the trip are your personal fitness, size of the group you walk with, and the quality of the guides. The smaller and more homogenous the group, the easier it will be to find a pace that suites everybody.
The porters and guides largely live on tips anyway, so instead of splurging with the tour operator, just give a little more tip at the end of the trip.
Cost
We paid USD 810 for entering the national park and USD 550 for the tour (both numbers are per head). Giving tips to each member of the crew is expected and there are even guidelines about how much to give, varying by job (porter, cook, guide). You should plan to give roughly 20% of the tour price as tips. We gave a little more and ended up with a total cost of USD 1600-1700 per head. That was 2013, so don't be surprised if it's (much) more expensive nowadays.
How does it work?
Luggage
You'll only carry a daypack which should contain everything you need between two camps. At the very least that will be water, snacks, rain gear, sun glasses, hat and gloves. Most probably you'll carry your camera as well. A set of pole sticks is completely optional, I found them to be very useful, especially on the way down.
Your main luggage with clothes and sleeping bag etc will be carried by the porters.
Camping
You'll sleep in a tent - at least on the Machame route we took there was no other option. For basic personal hygiene there were bowls with hot water prepared by our crew. The camp sites have basic sanitary facilities (running cold water and basic toilets). Our 'common room' tent with chairs and table proved to be awesome not only for breakfast and dinner but also for killing time playing cards. After walking uphill a couple hours in the thin air it's simply nice to have a proper chair to sit down on.
Food
Well yeah, the food was nutritious and there always was enough. Don't expect culinary highlights or local specialties. If you enjoy a good coffee, either brace yourself for instant coffee or tea, or bring your own. If I were to do this tour again, I'd bring an Aeropress and proper coffee for sure.
Preparational Meeting
The evening before the start, Bryson, the owner of our tour agency, and our head guide came to meet us in our hotel. We talked through the schedule one more time and checked our gear for completeness since this would be the last chance to rent any missing items. We just lacked a couple water bottles to complement our camel backs, those were free for the duration of the tour.
September 7 - Day 1
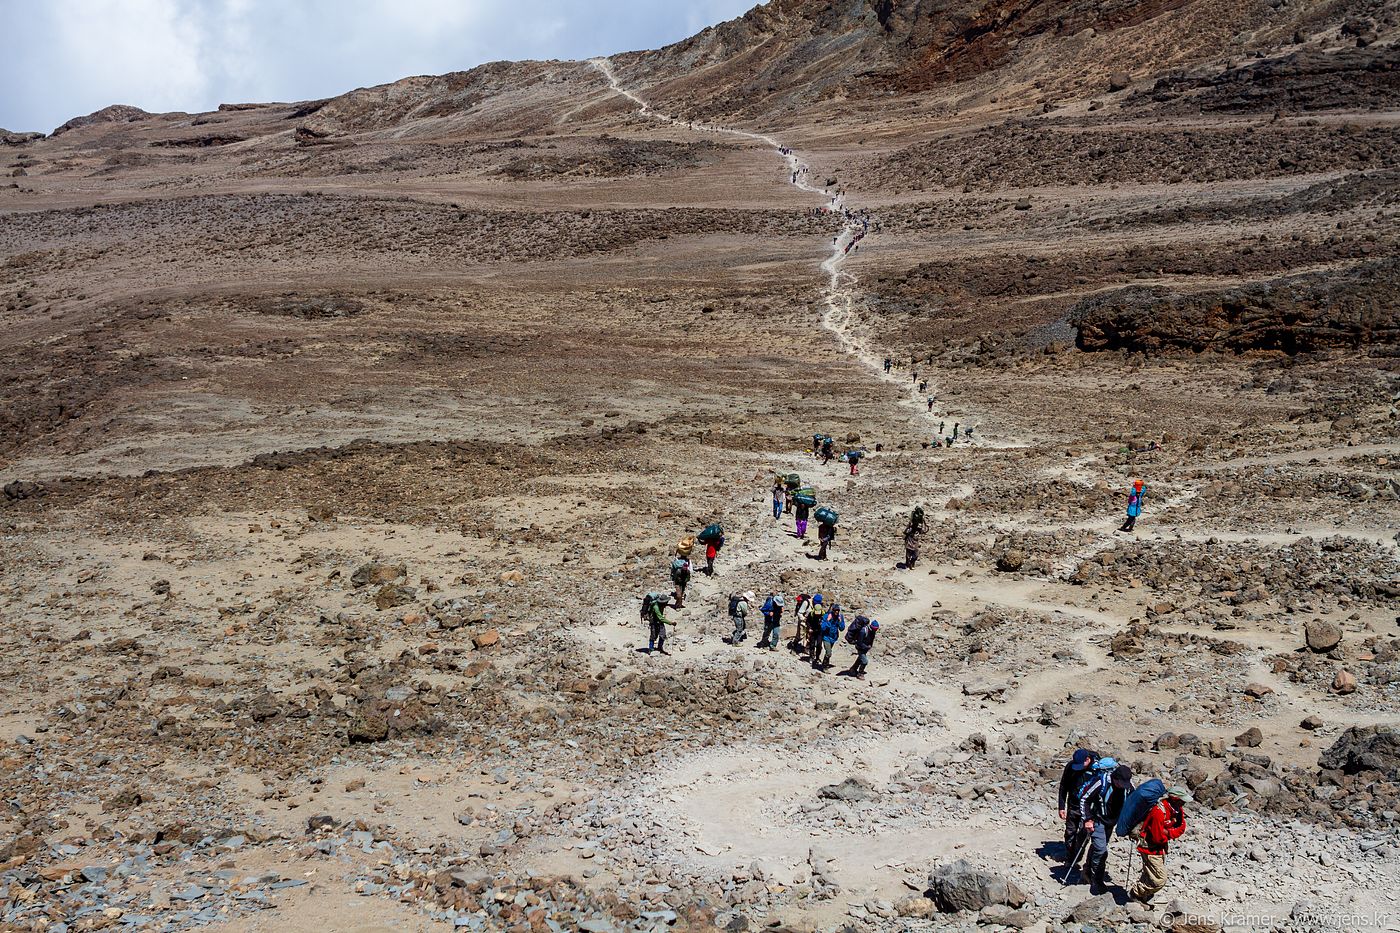
We were picked up after breakfast and driven to the entrance of the national park (Machame Gate, 1743m above sea level). If you didn't know until then, here you will get an idea how many people walk up that mountain every day. The place was really busy while all kinds of groups were getting ready to start their hike.

Unloading our stuff and all the supplies and gear provided by our tour organizer, paying the national park fees and distributing all the things evenly among the porters (the weight a single porter is allowed to carry is strictly regulated and this rule is enforced by weighing everything) took about an hour and then we were ready to go.

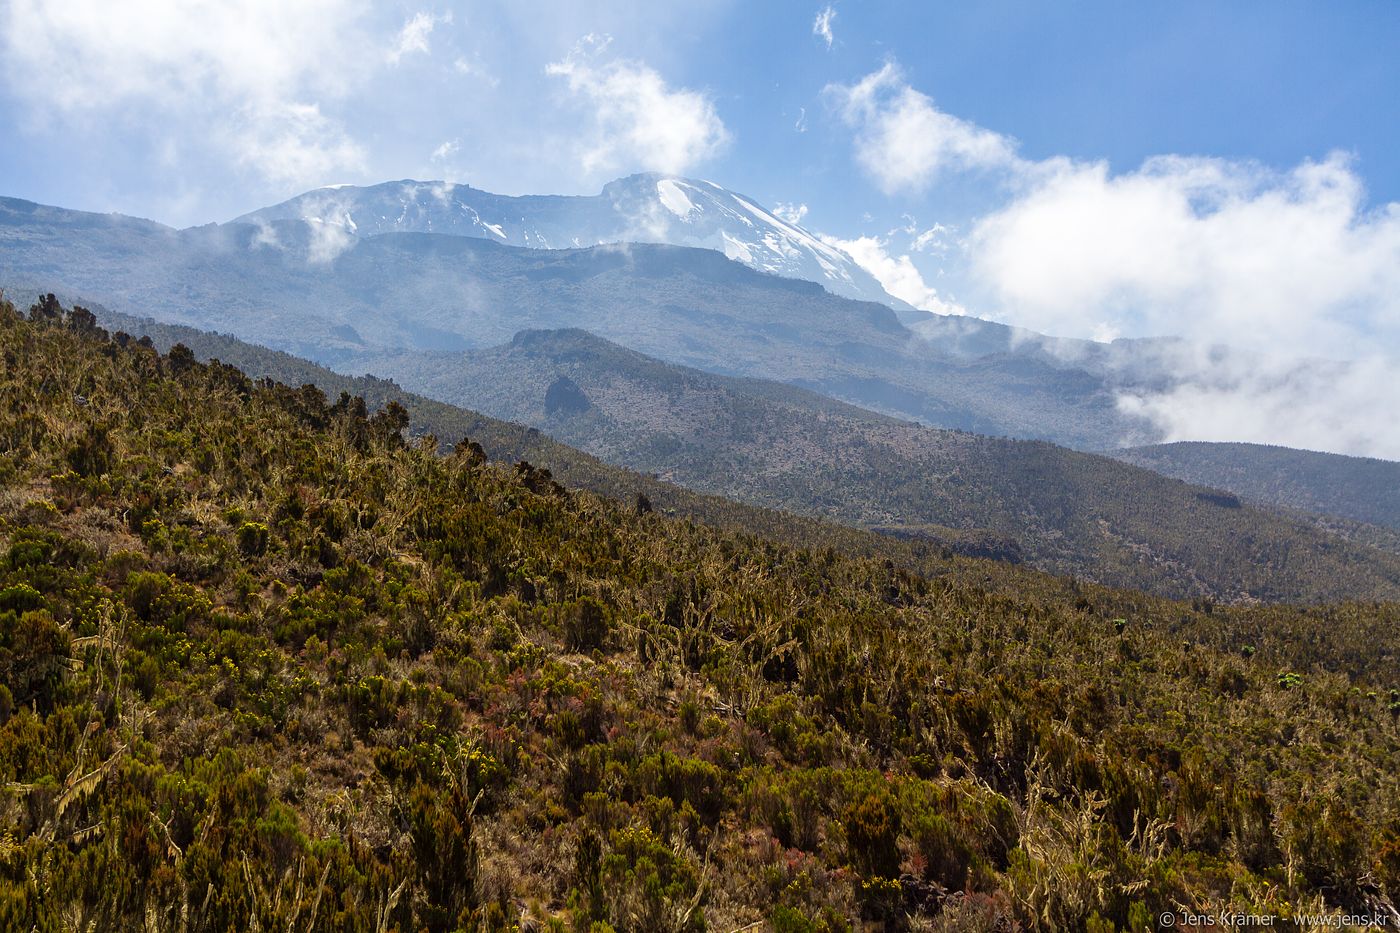
The path went uphill all the time but wasn't really steep. In the beginning we walked through beautiful and misty rain forest, but soon the trees got smaller and finally gave way to thick bushland.

In the afternoon we reached Machame Camp at 3000m where we would spend the first night. Tents were already set up when we arrived, and our backpacks were also there already. This surely wasn't the last time we came to appreciate the porters for the great job they were doing.

Day 2 - Shira Camp
Shira Camp at about 3800m is the destination for today. With increasing altitude vegetation gets less dense quickly.

In the afternoon we did a small acclimatization hike up a few hundred meters to nearby Shira Caves.


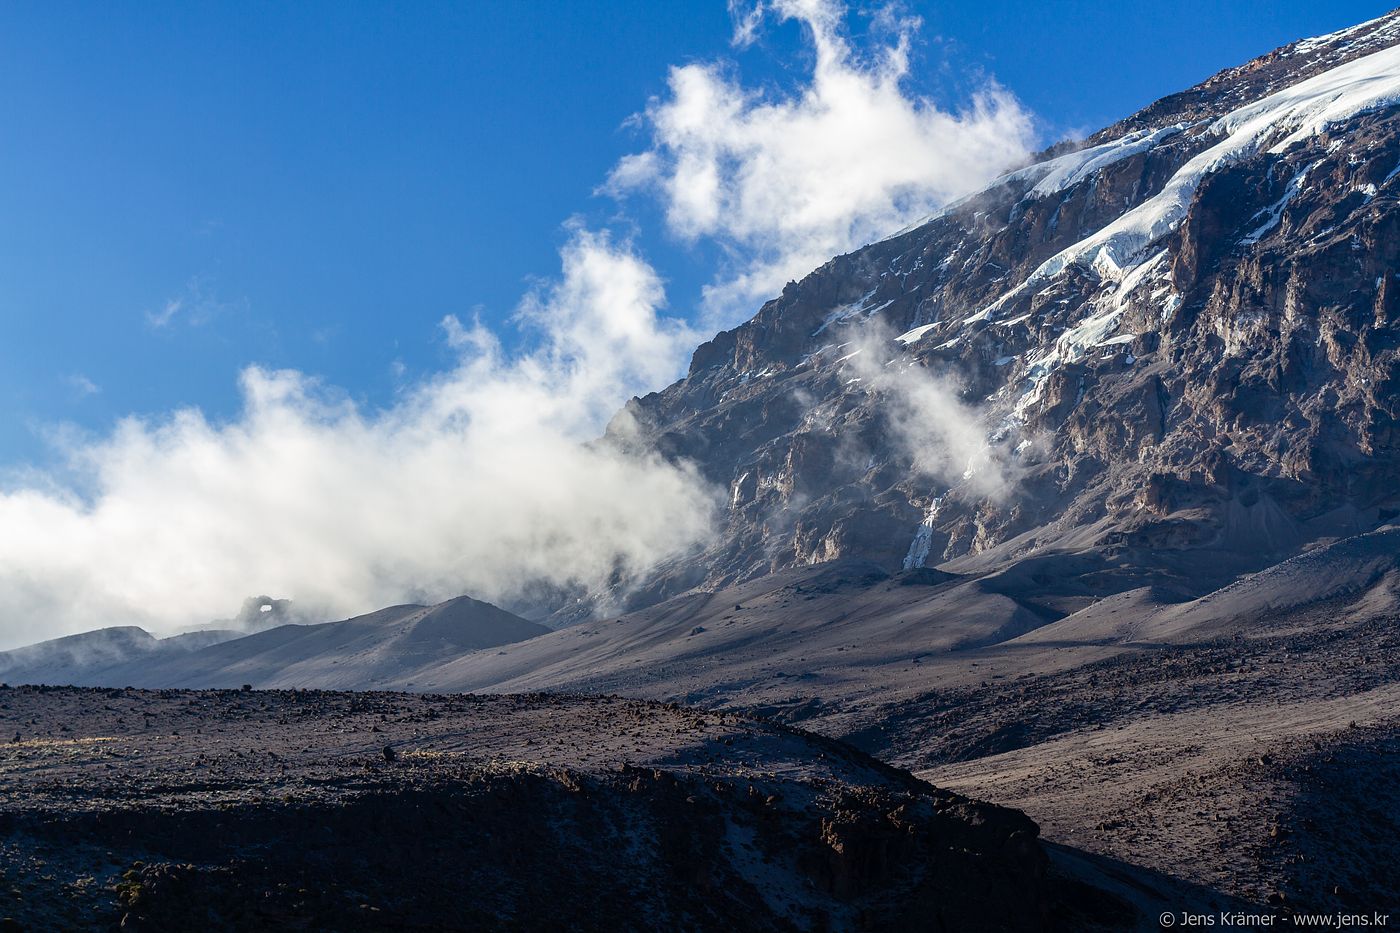
Day 3 - Lava Tower and Barranco Valley
Lava Tower at about 4600m marks the highest point of today's route, after which it leads down to Barranco Valley at 3950m. This 'walk high, sleep low' day helps acclimatization and serves as preparation for the following higher altitudes. It's a long day and in the higher parts the lack of oxygen in the air was for sure noticeable.


In the afternoon we arrive at the camp site.

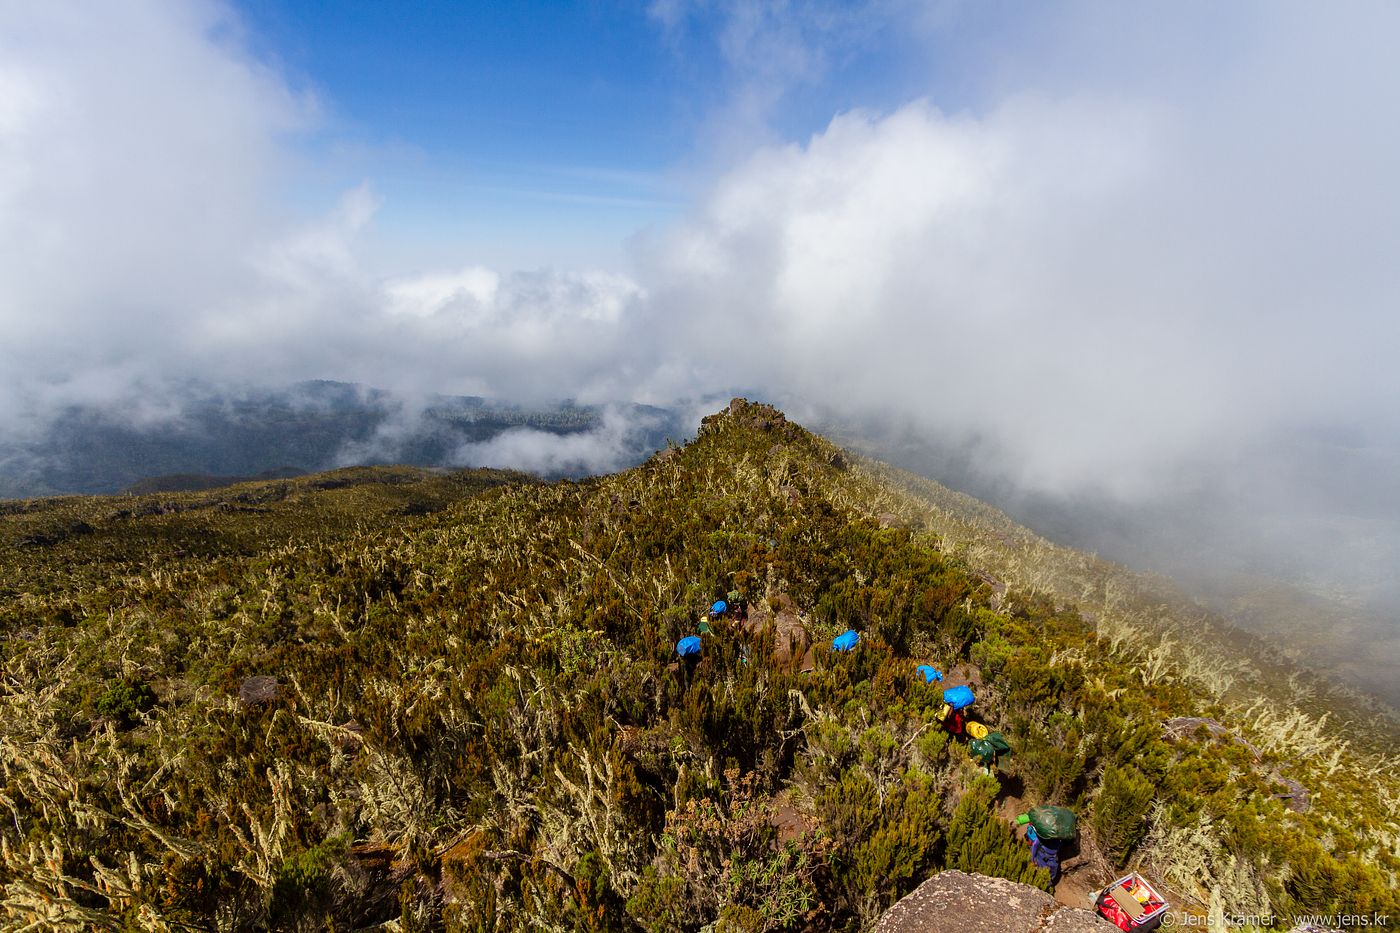
Day 4 - Via the Barranco Wall to Karanga Valley


Barranco wall (picture above) is really steep, and combined with the altitude it was very exhausting for sure. But we did it :) After that it's more or less a walk in the park down to Karanga Valley Camp at an altitude of 4000m.


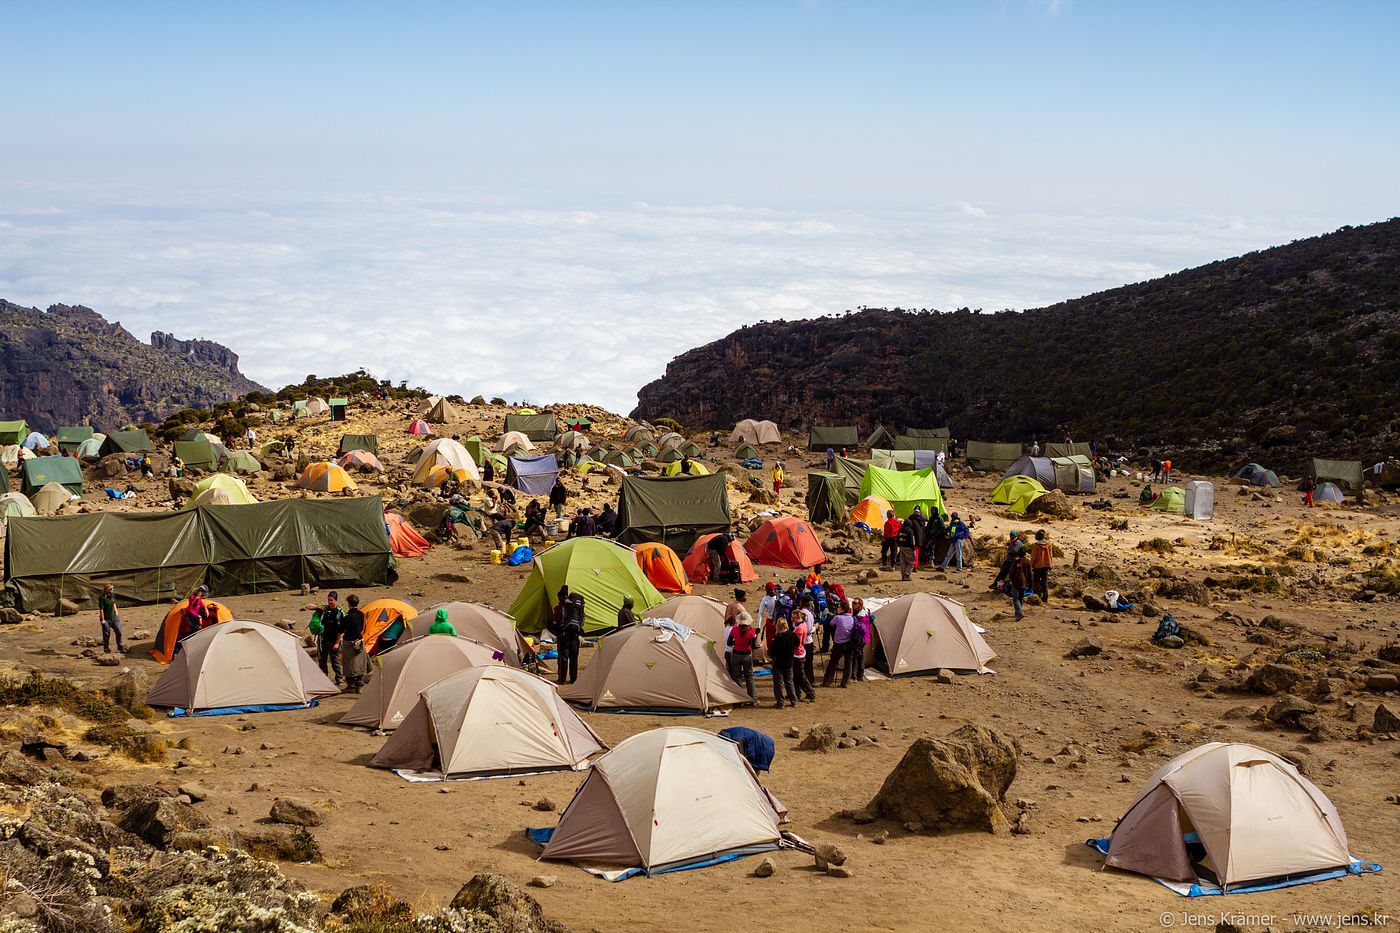
Day 5 - To Barafu Camp
Again the morning brings a clear view down into the valley. This is a short day going up to Barafu Camp which is at 4645m.

")
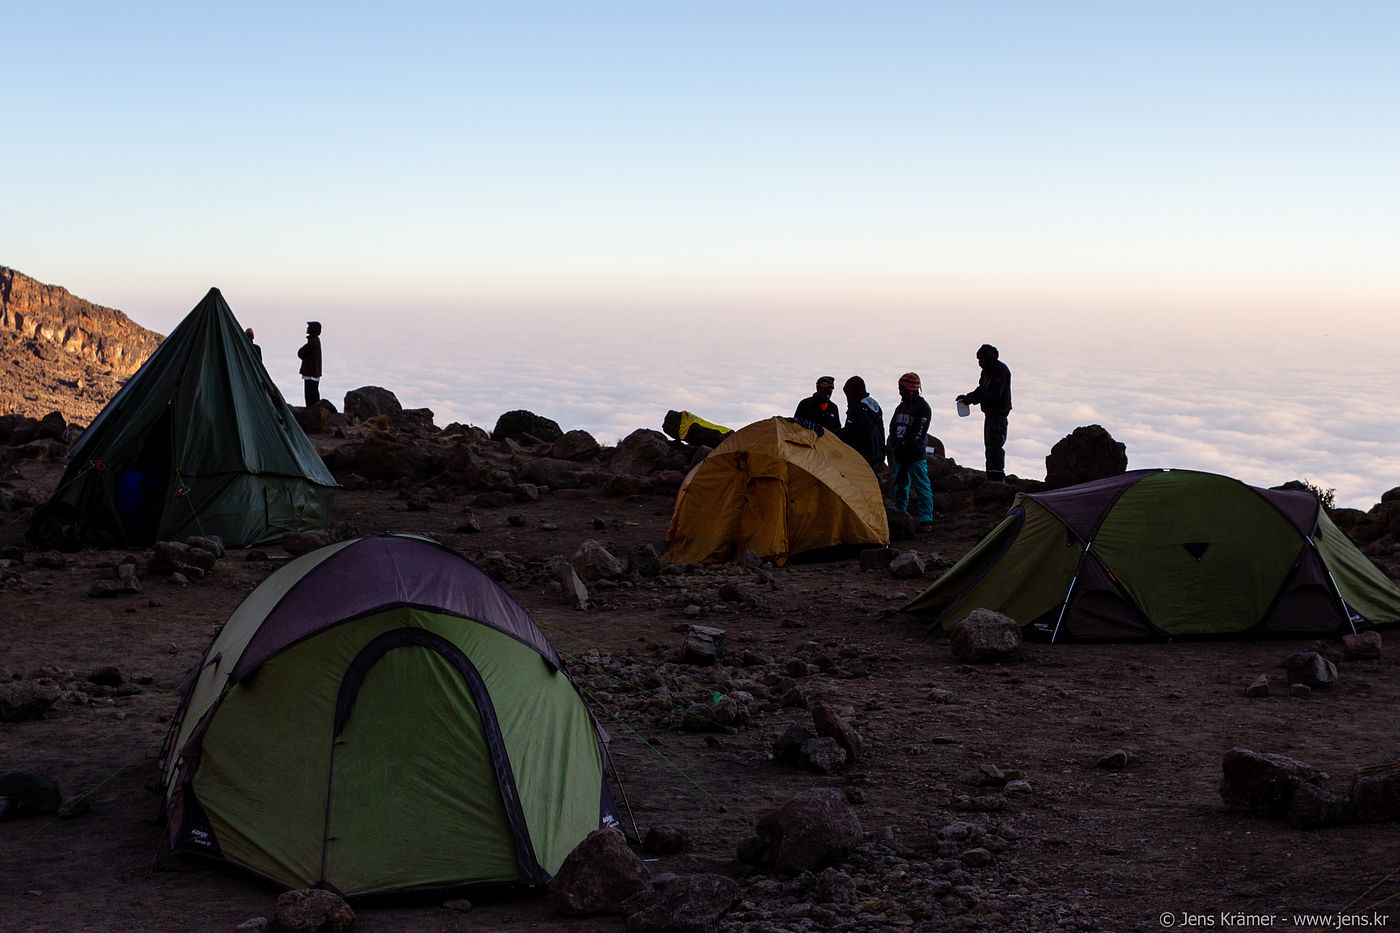
Very little vegetation is left at this height, and first signs of altitude sickness show up in the form of slight headaches. We try to get some sleep but excitement over the upcoming climb up the summit and the altitude make this a difficult task.
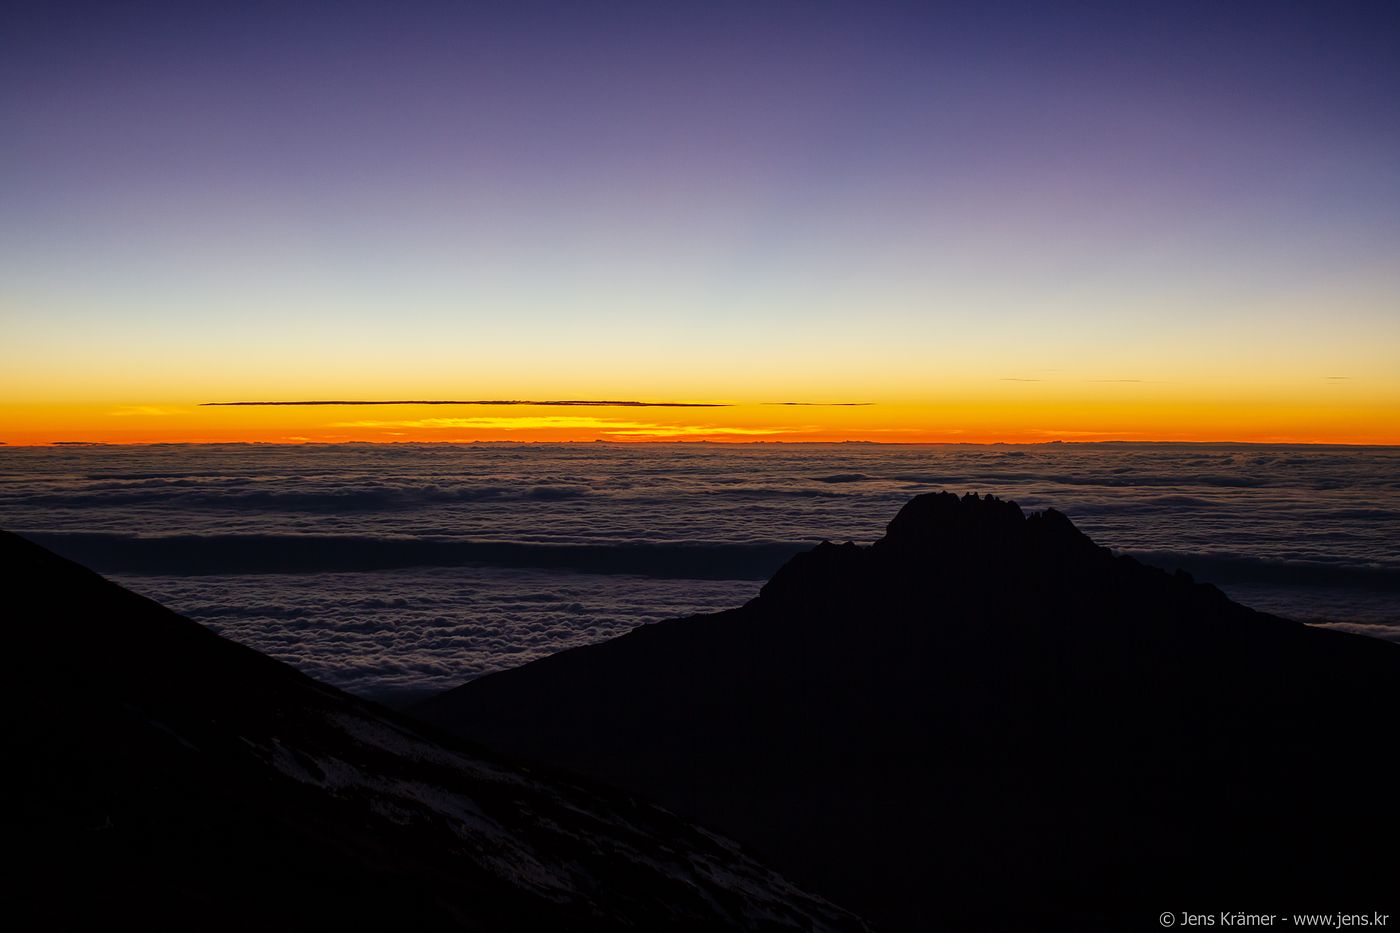
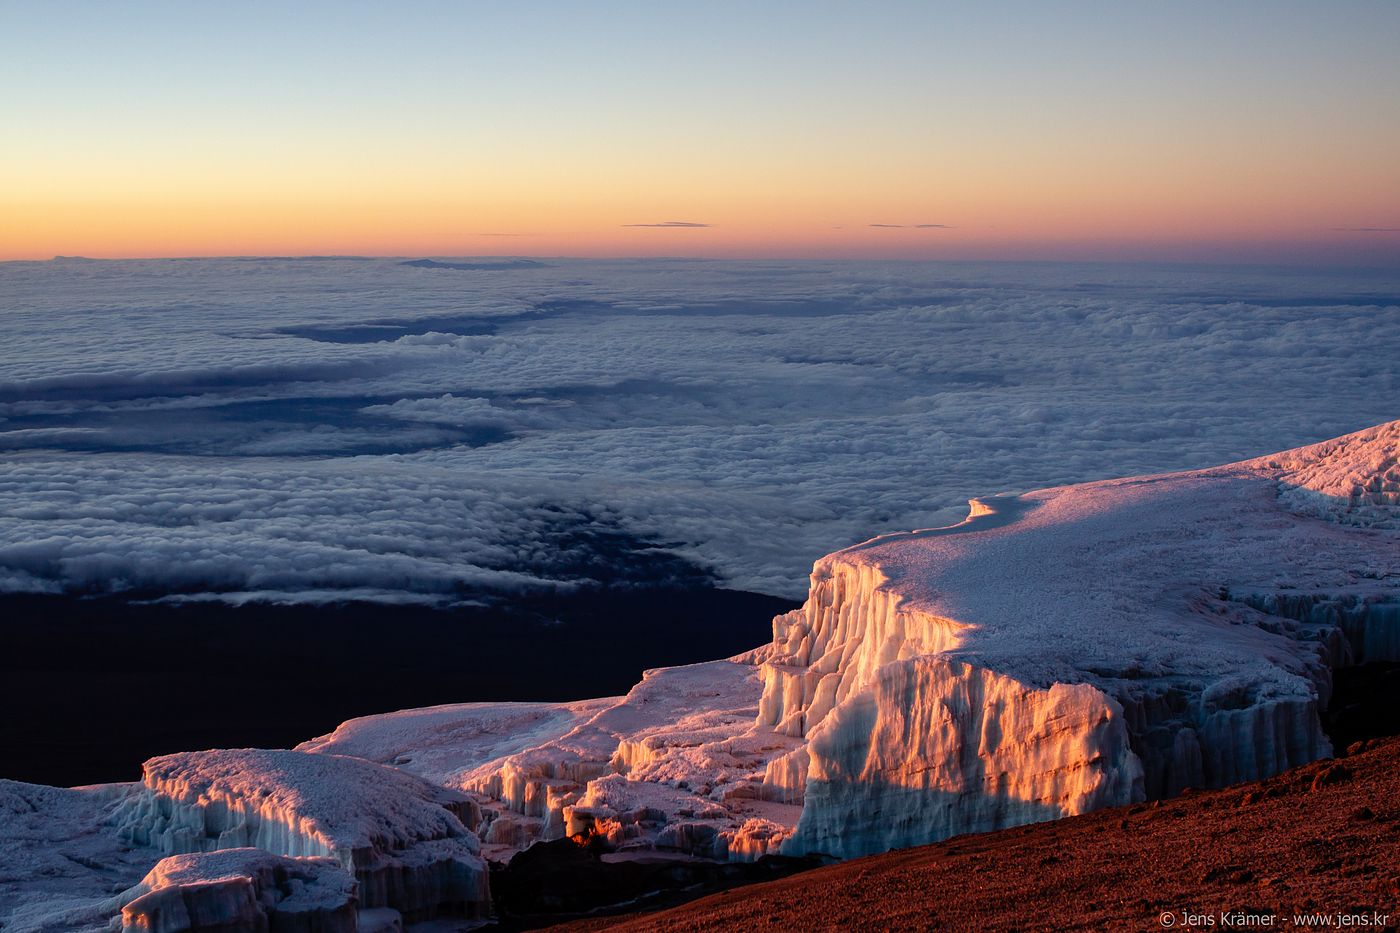
Day 6 - Uhuru Peak
Not long after midnight we start the final ascent up to the summit. At sunrise we reached Stella Point at the crater rim (5685m). The crater, the ice and the rising sun make for some great photo opportunities, but exhaustion, wind and freezing cold make taking photos also quite hard.


The final stretch up to Uhuru Peak (5895m) took another hour or so and I'd consider it to be the most difficult part of the whole tour. Exhaustion and lack of oxygen caused headaches and every step forward required a dedicated effort. But giving up with the goal in sight was out of the question and so finally we reached Uhuru Peak, the highest point of Africa!


Going, or better, sliding down, back to Barafu camp took a few hours. After lunch we set off to Mweka Camp (3100m), eager to lose altitude and relieve our bodys from the constant lack of oxygen. I've already been using my pole sticks most of the time going up, but going down they were really helpful to take some load off my knees.
We reached Mweka Camp quite early and thus had the option to walk on all the way to the Gate, skipping the last night in the tents. The idea of taking a dip in our hotel swimming pool and having a cold one before falling to sleep in a real bed quickly formed in our heads and made the decision fairly easy.